

The workflow page
The layout mirrors the prompt page: editor on the left, run pane on the right. At the top: name, slug, history, and evaluations – same as prompts. Below that, the revision bar with version selection, publish, undo/redo, autosave, and save. Below the revision bar: the canvas, filling the rest of the screen. This is where you build.The canvas
The canvas is a drag-and-drop node editor. Add nodes from the + button at the bottom right, then wire them together by dragging connections between their handles. Data flows left to right. Each node has input handles on the left and output handles on the right. Connect an output to an input and data moves between them when the workflow runs. Everything is a string. Structured data travels as JSON strings. You don’t need to define schemas between nodes – the transformation nodes (String, Array, JSON Query) help you reshape data along the way. It’s deliberately simple: if you can read a JSON blob, you can understand what’s flowing through your workflow.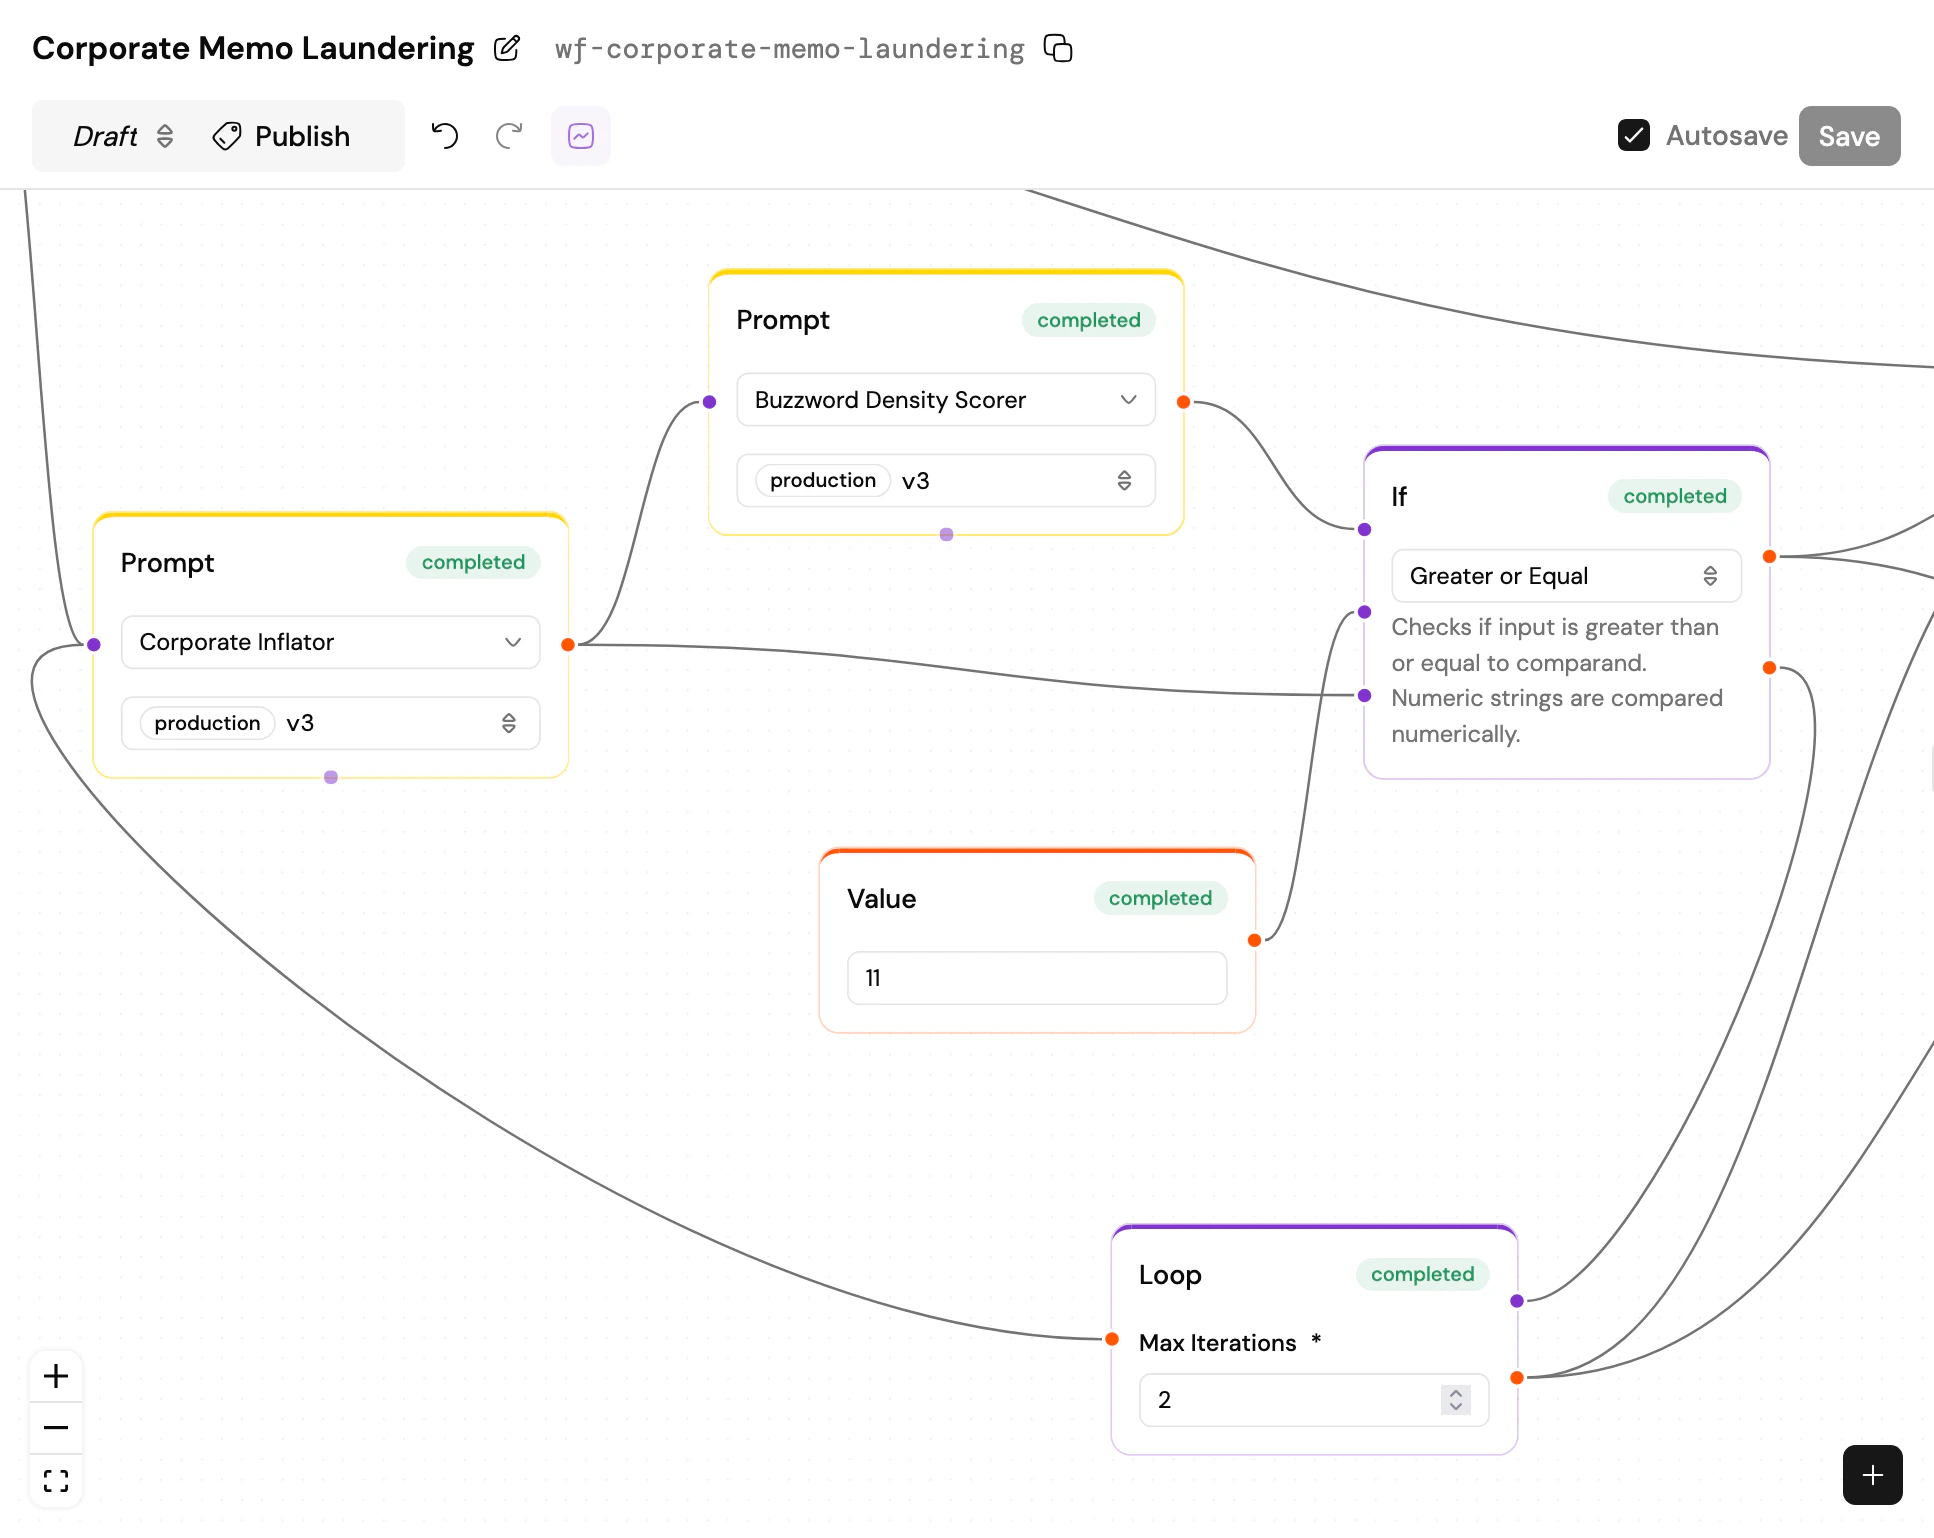
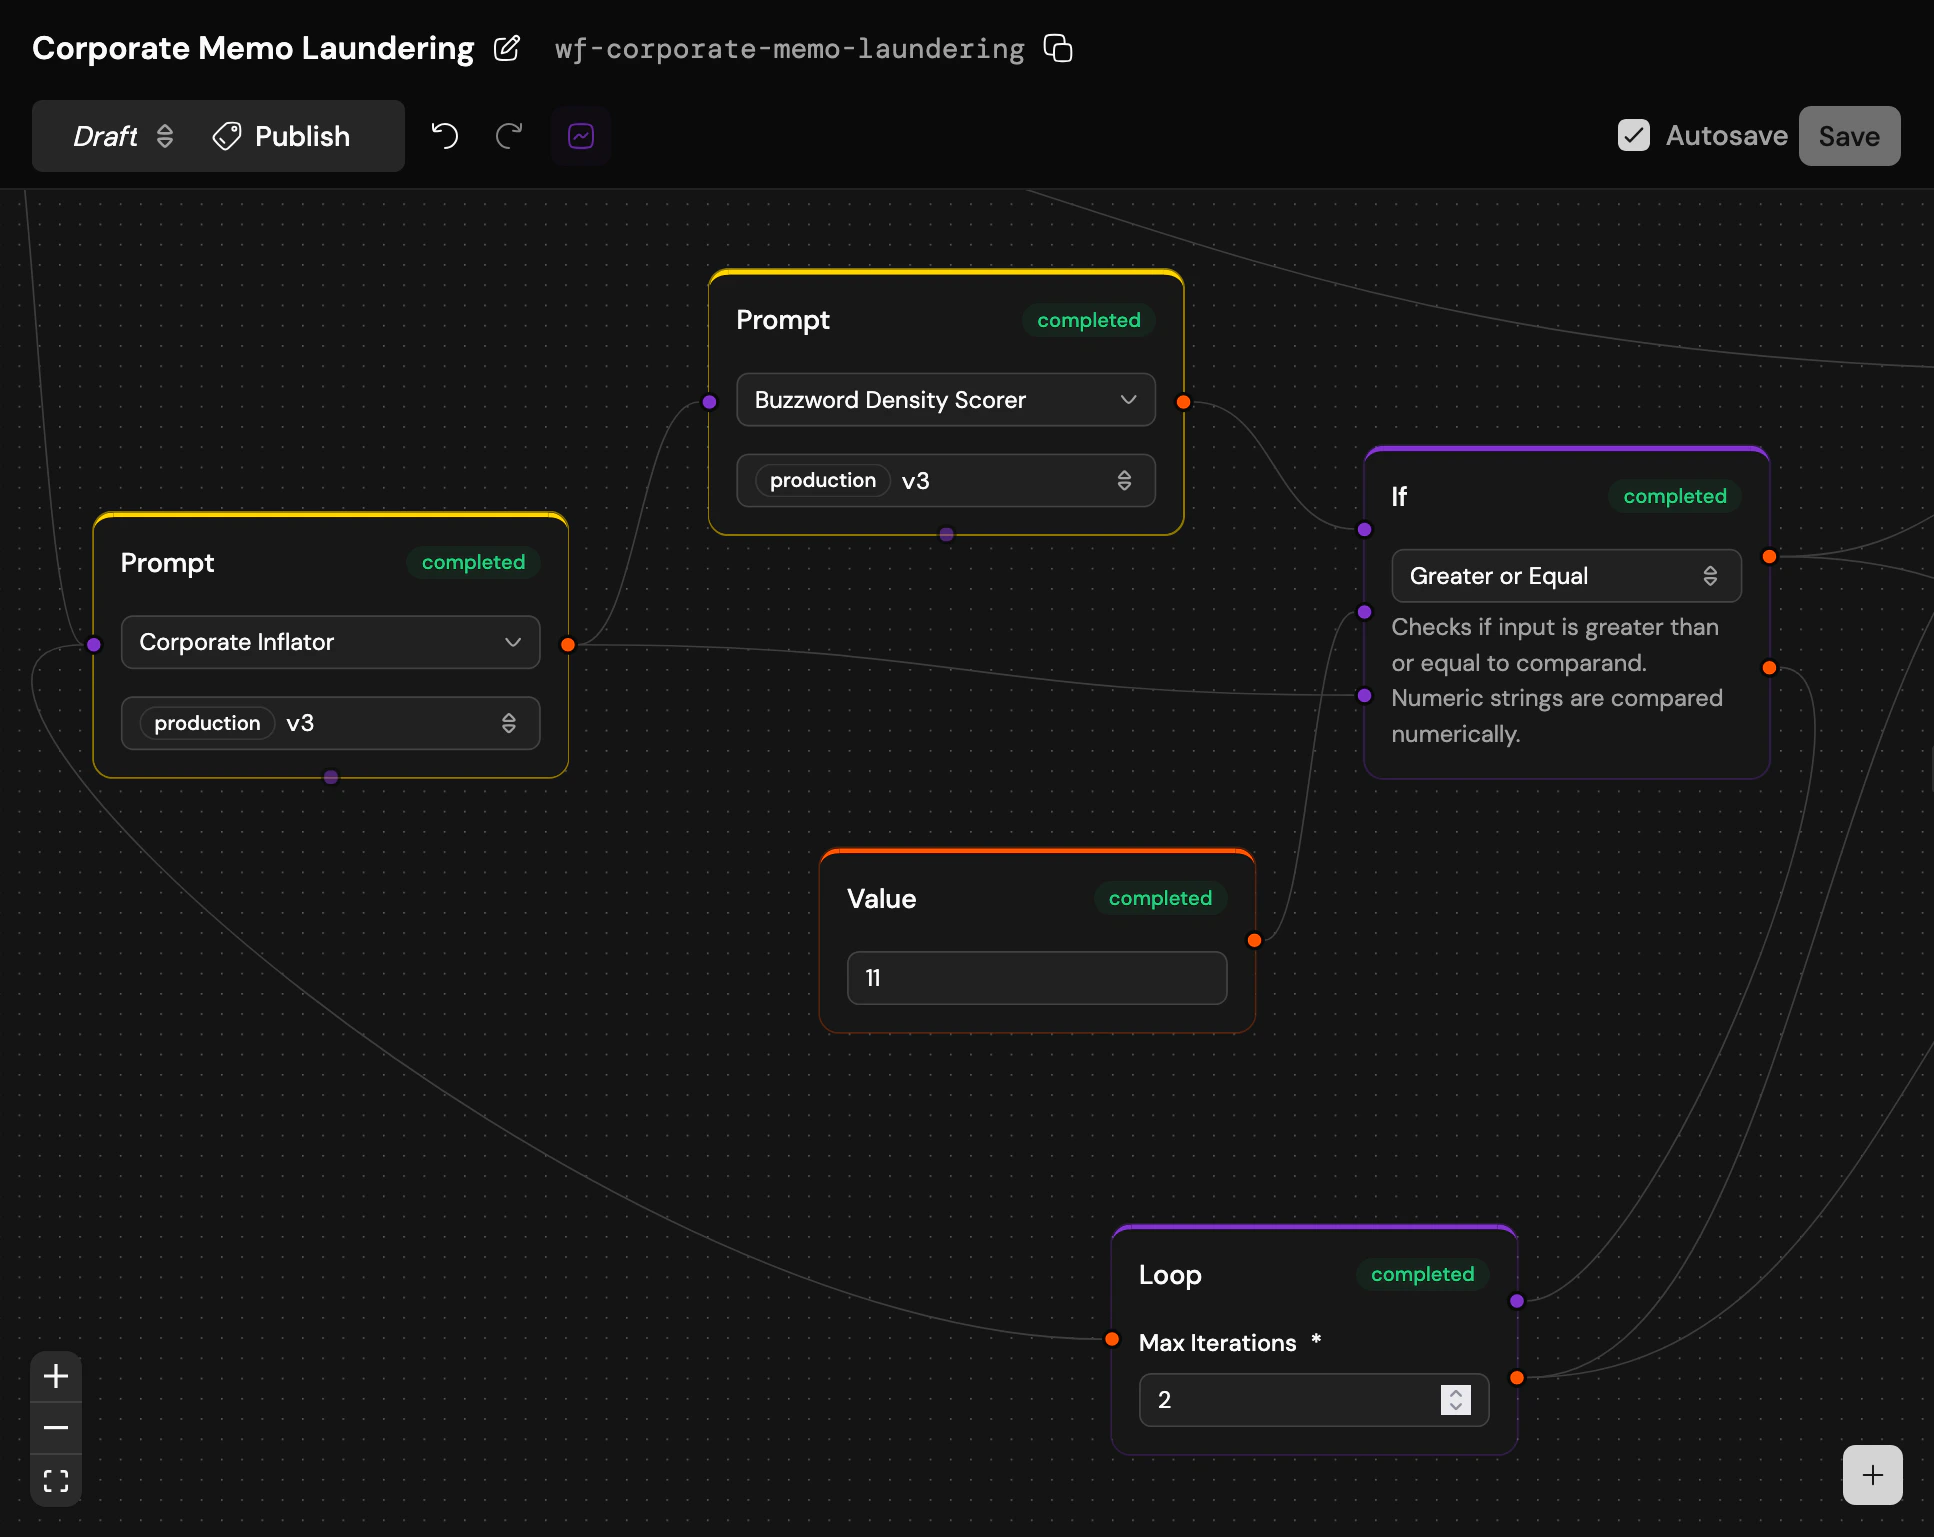
The workflow canvas: nodes, wiring, and the toolbar
Skipping and merging
When a control flow node doesn’t activate an output, the entire downstream branch is marked as skipped. Skipped nodes produce no output and consume no resources. When multiple edges wire into the same input handle, the values merge. If two active branches both feed into a summary prompt, their outputs arrive as a JSON array. If one of those branches was skipped (say, by an If or Switch upstream), it’s simply ignored – only the active branch’s output arrives. A single active value stays as-is, no wrapping. No nulls to handle, no special cases.Node types
Every node does one thing well. Wire them together and the possibilities multiply.
See Workflow Nodes for detailed documentation on each type.